Announcements can be used to promote upcoming workshops, share important reminders, communicate upcoming deadlines, and more!
Announcements can be created or edited by professional users with certain permissions. If you have these permissions as a professional user, you can create announcements for the landing page, login page, or the workspace for professional users. Workspace announcements can also be customized by location.
Login screen: You can create announcements on the professional login screen and on the participant / customer login screen.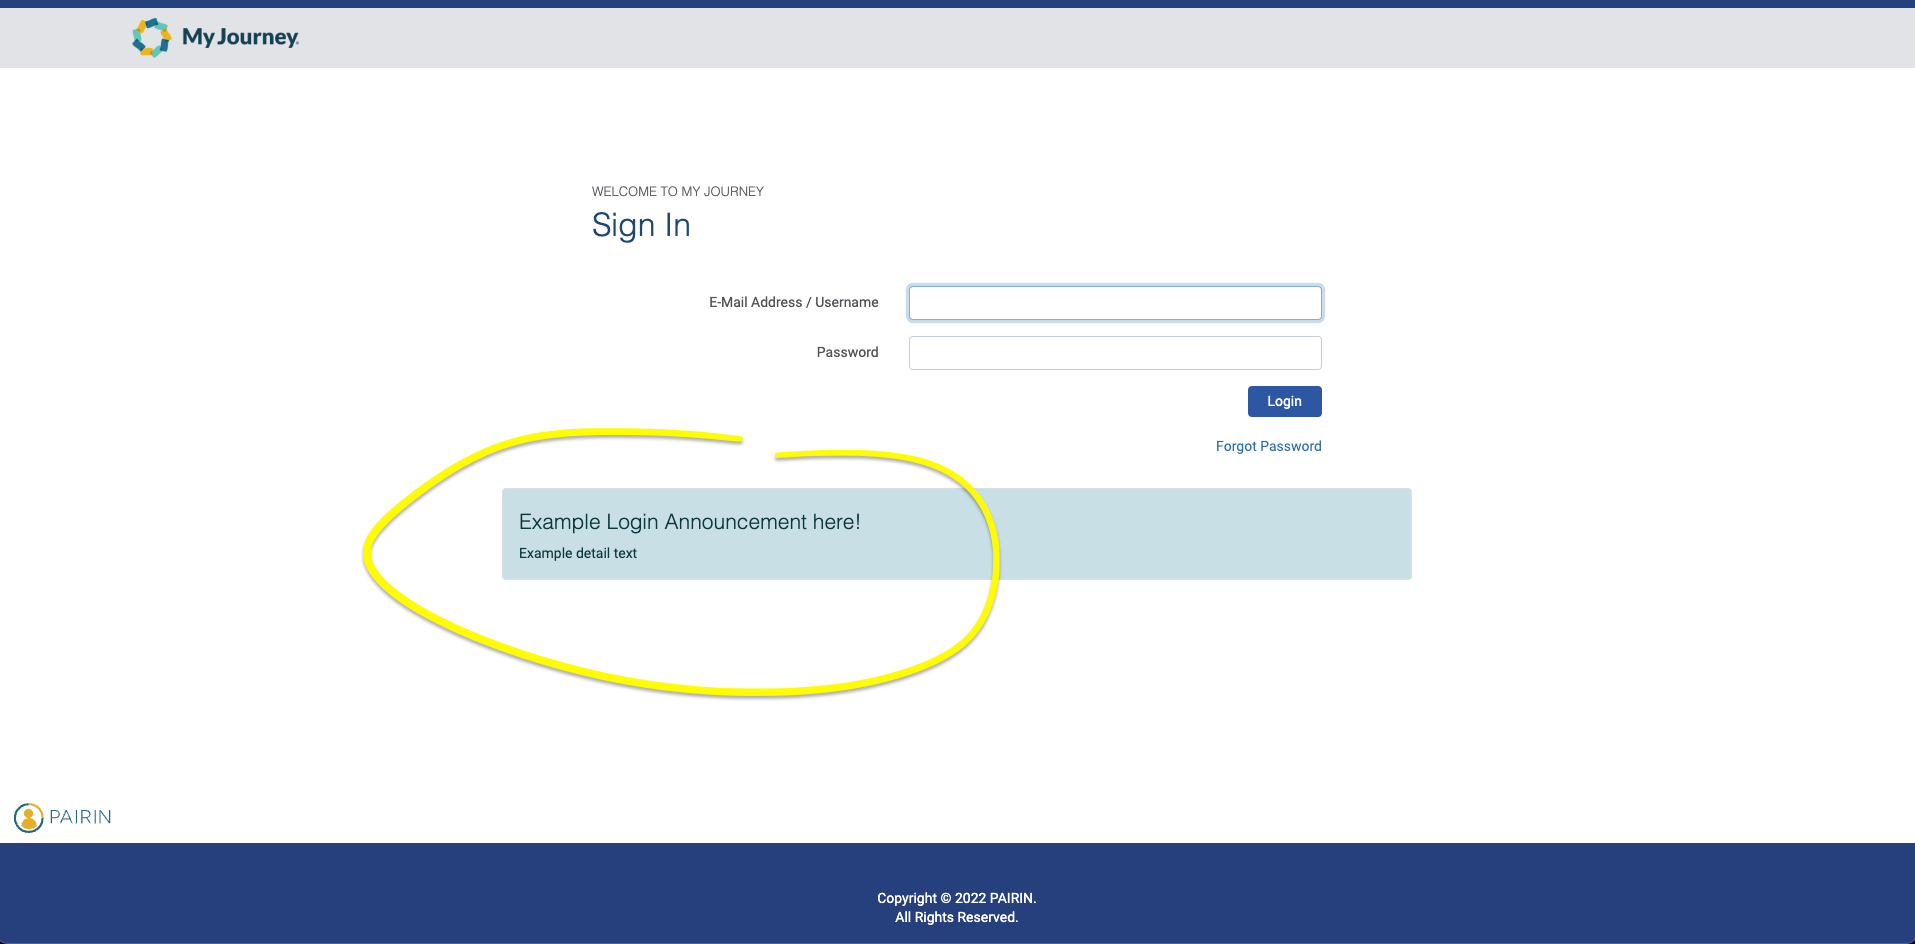
My Workspace: You can create announcements for the Announcements section of My Workspace. You can opt to include this announcement in all of your locations, or you can select a subset. 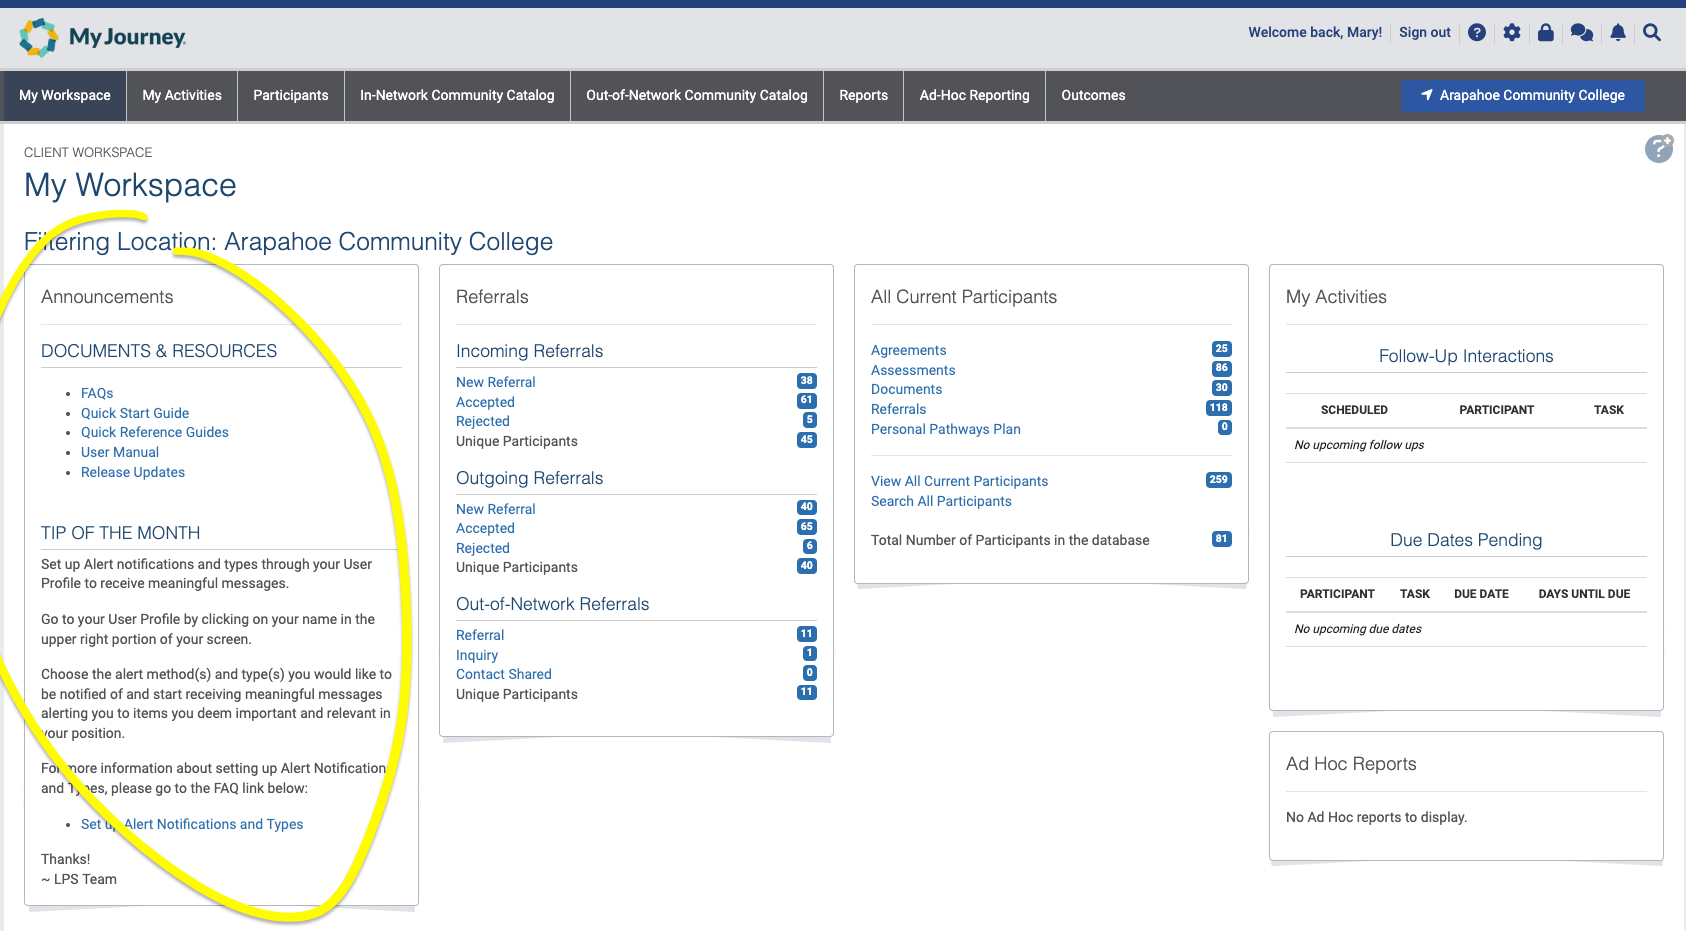
To create or edit announcements, watch the below video. If you prefer a step-by-step guide, scroll below for directions.
1. Navigate to "Client Settings" and then "Announcements"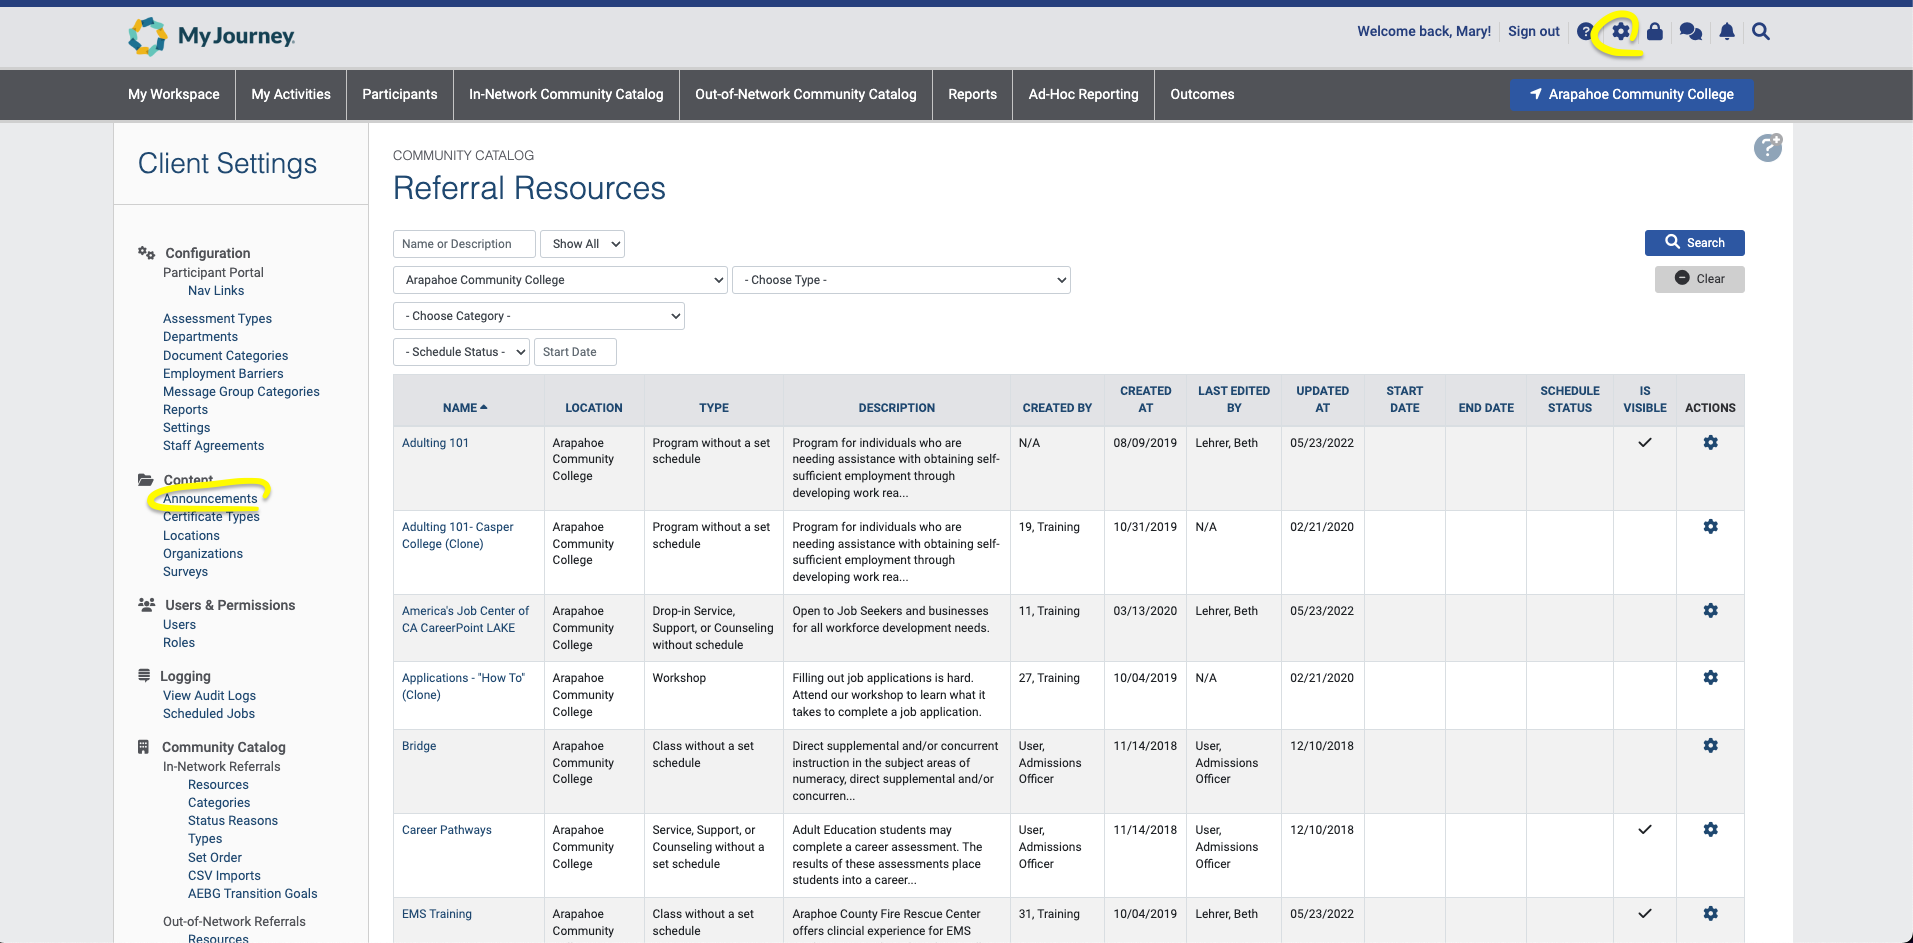
2. Select the icon to edit an existing announcement, or click "Create Announcement" to build a new one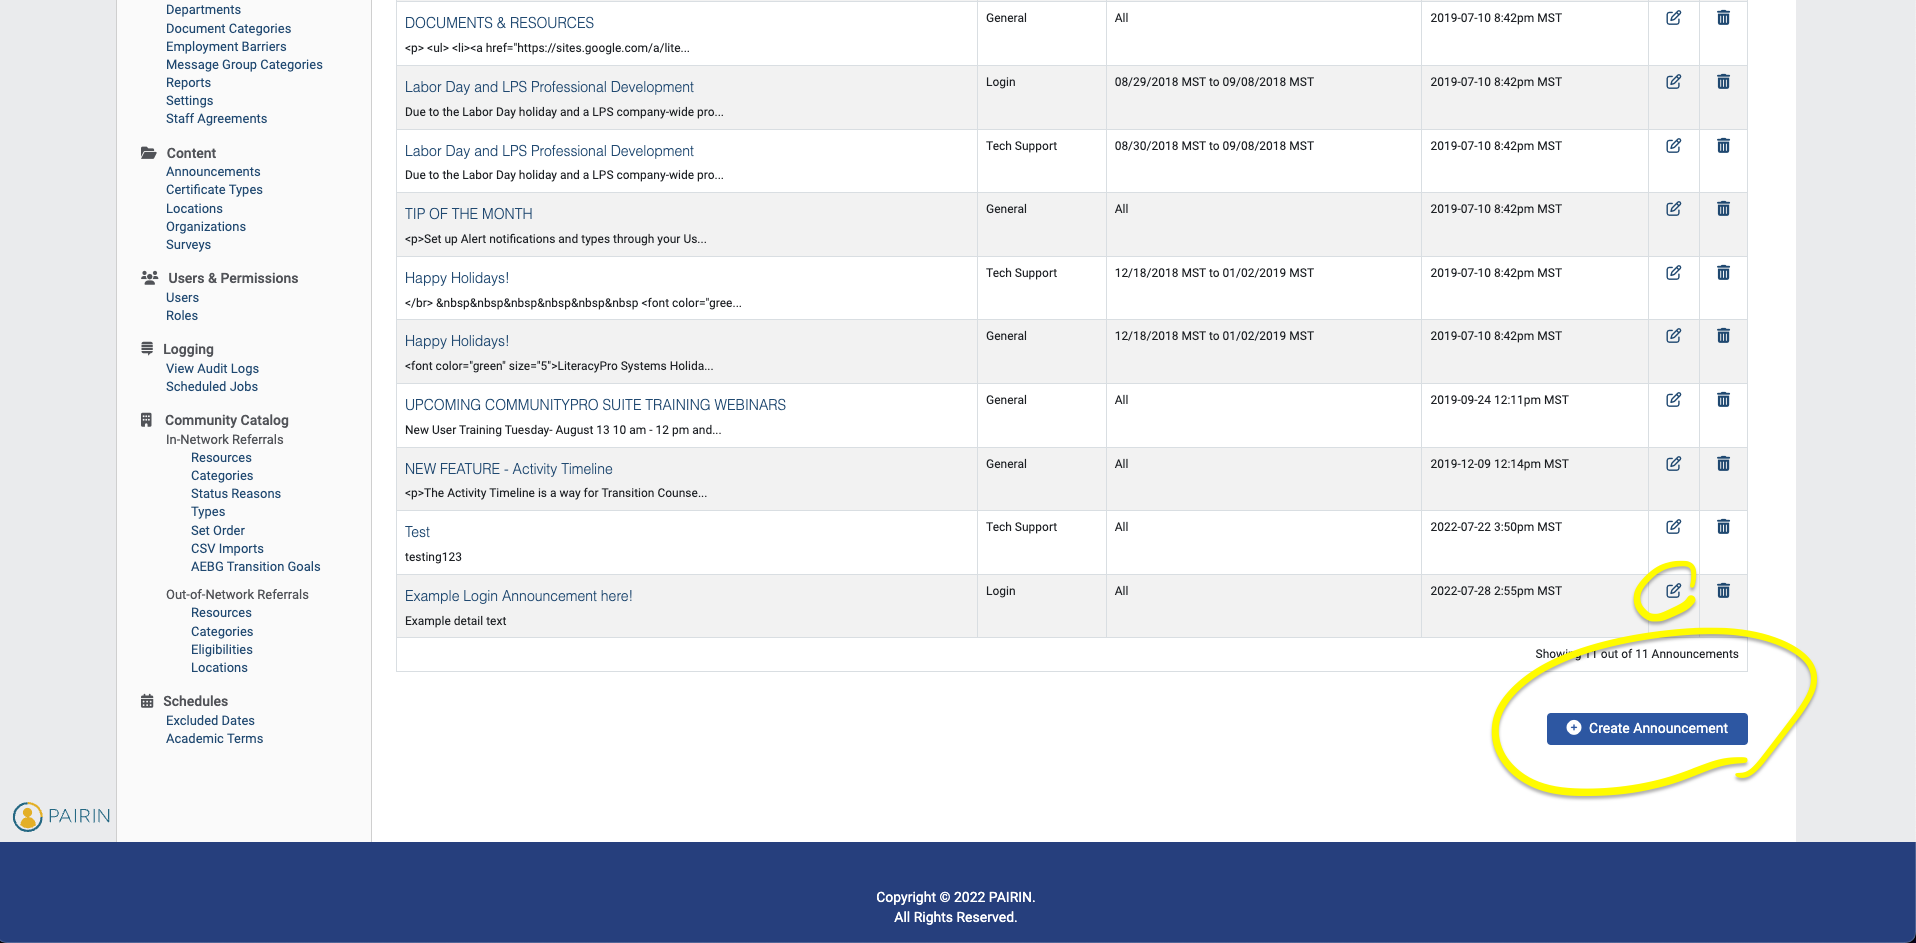
3. Input your announcement title and body text. For announcements on the My Workspace section, select "General" as the Type. "Login" will direct the announcement to the Professional Portal login, and "Participant Portal Login" will direct the announcement to the Participant Portal Login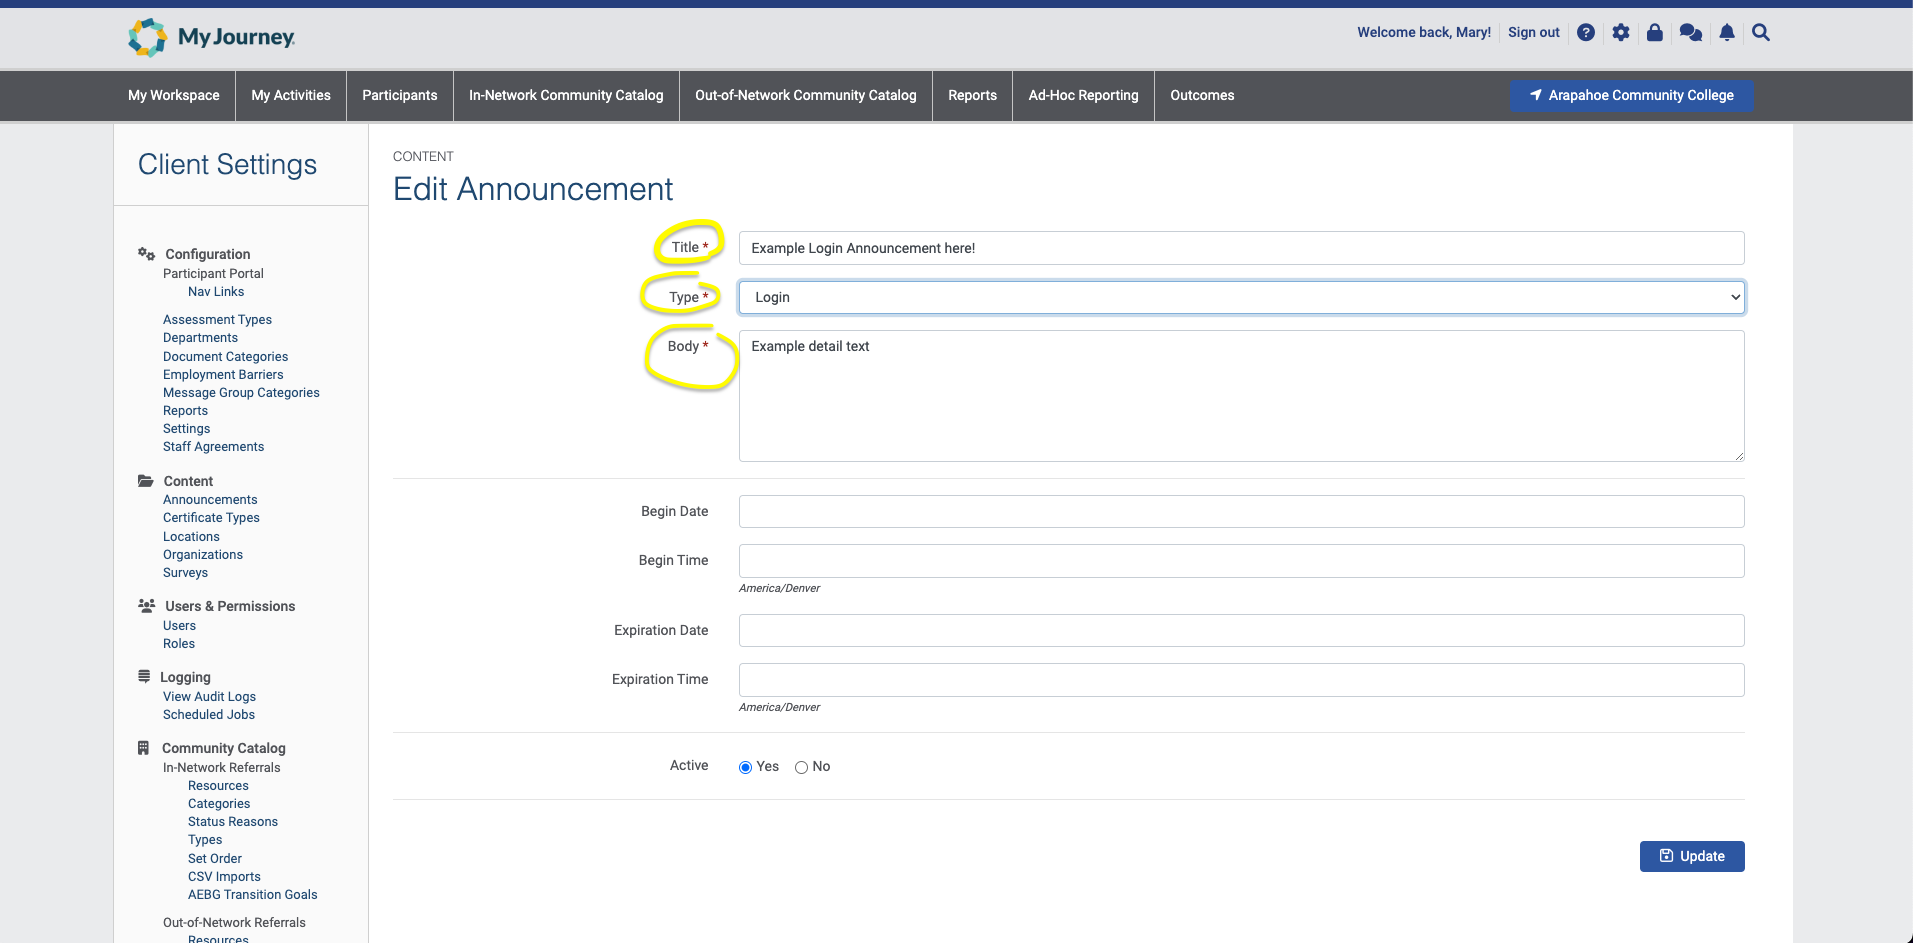
4. You can select a start date and time, and and expiration date and time for the announcement. These fields are not required, so if you want the announcement to be published right away and stay indefinitely, keep these fields blank!
5. Make sure to select "yes" for "Active" for your announcement to be live. If you want to pause your announcement or take it down, you can always come back and switch this to "no"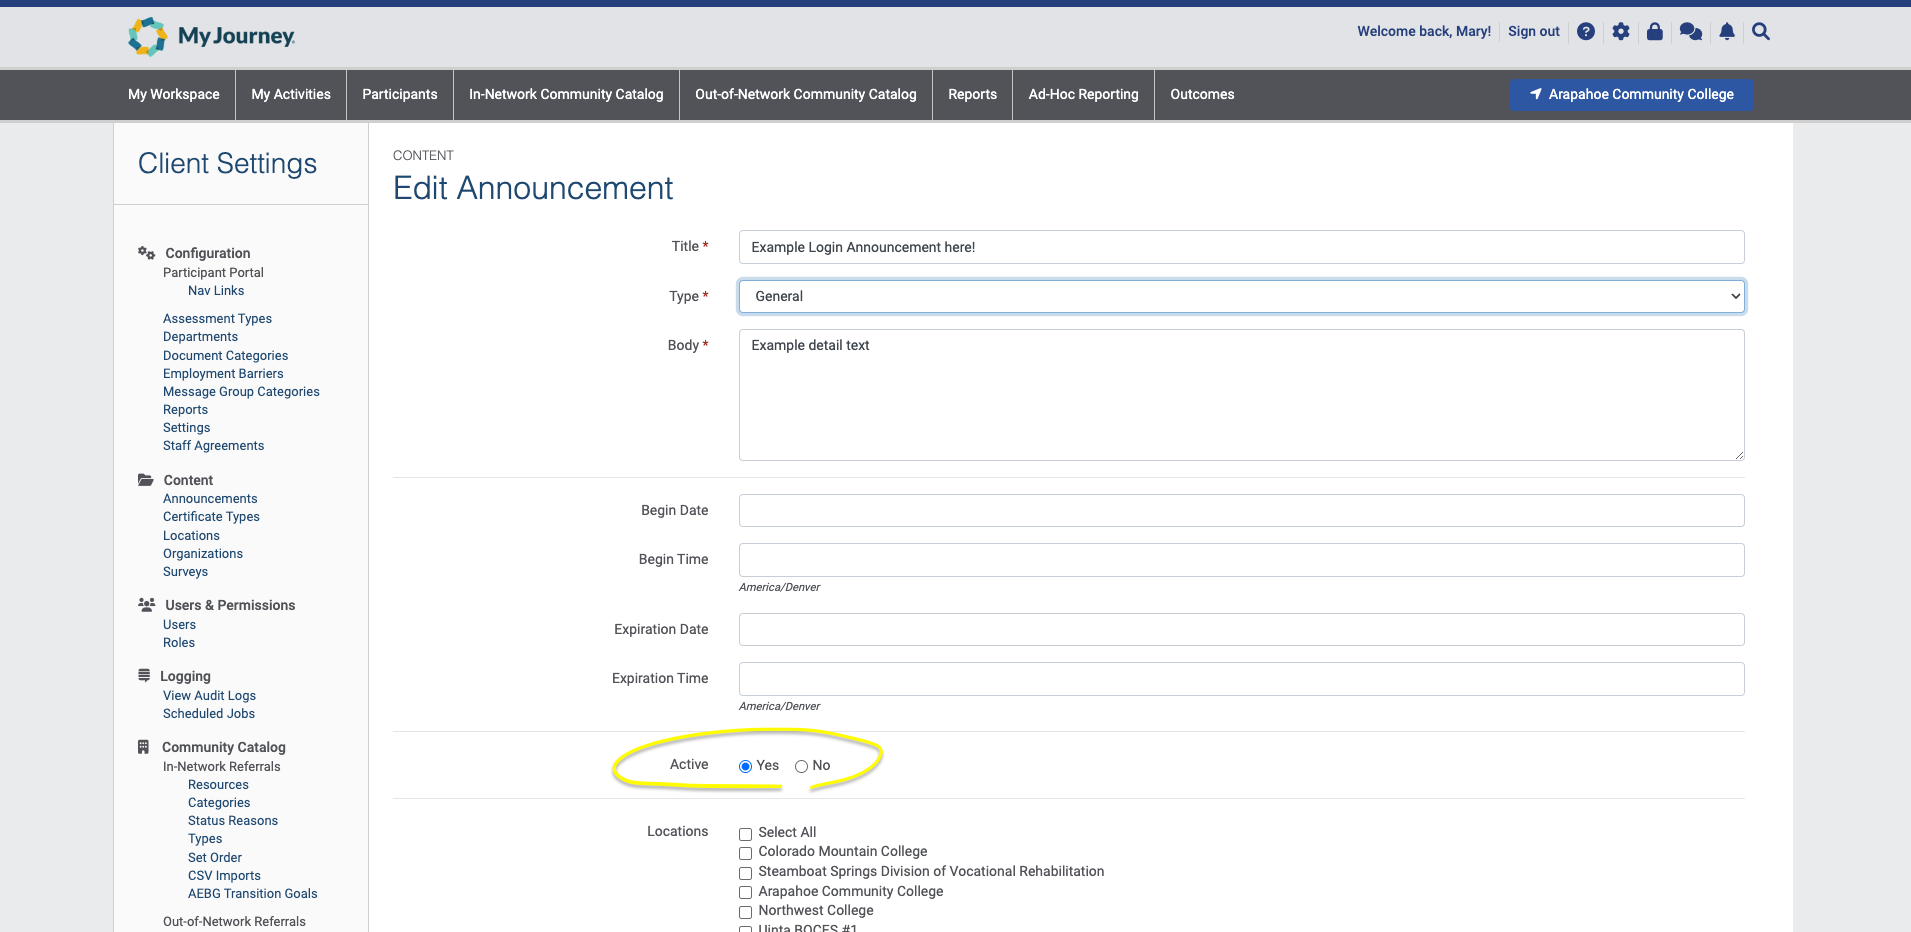
6. For announcements on My Workspace ("General" Type), you can also select which locations you would like to see the announcement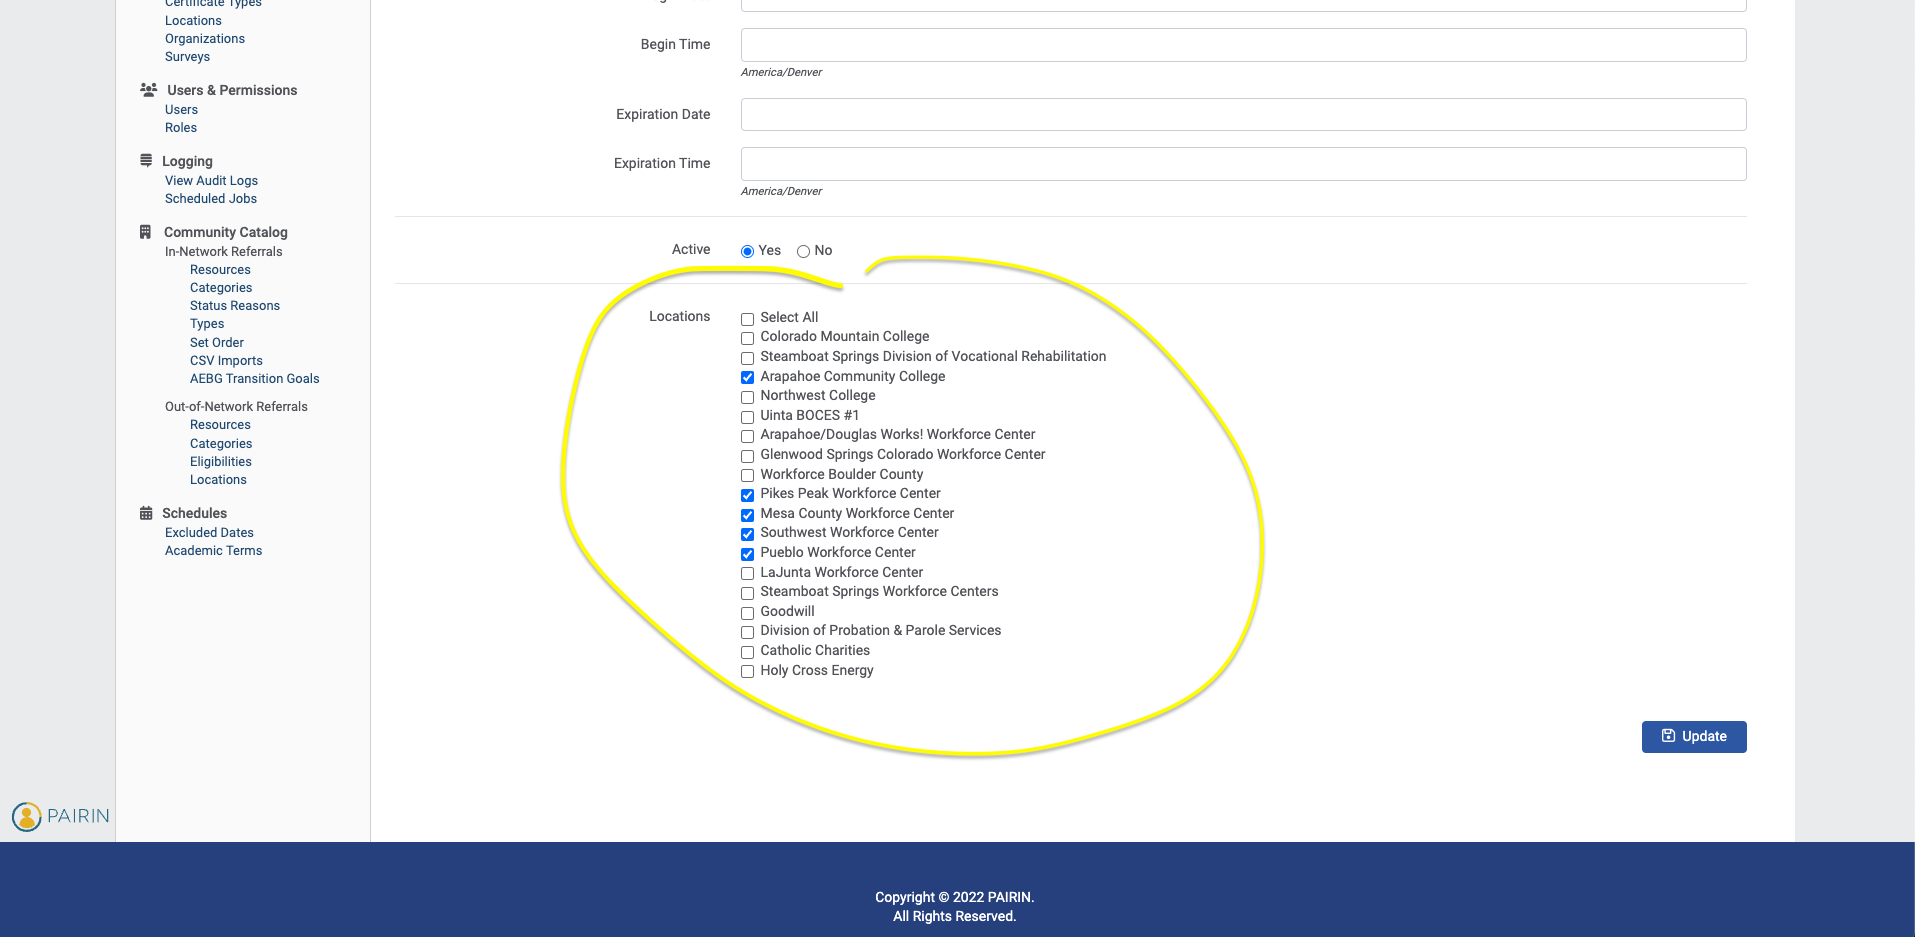
When you're happy with your input, click "Update" and check your announcement to make sure it appears as you intended.
Comments
0 comments
Please sign in to leave a comment.